Prepare the Google Cloud Platform (GCP) environment
1. Create a new project (optional)
A project forms the basis for creating, enabling and using all GCP services, managing APIs, enabling billing, adding and removing collaborators, and managing permissions. Go to the GCP cloud resource manager and click on create project to get started. You can follow these instructions to create a new GCP project.
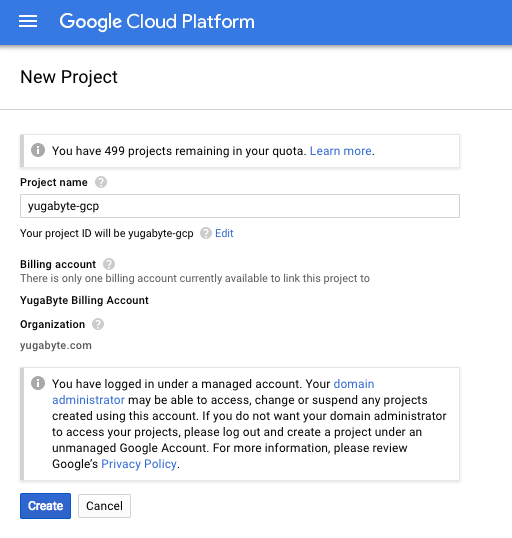
Give the project a suitable name (for example, yugabyte-gcp) and note the project ID (for example, yugabyte-gcp). You should see a dialog that looks like the screenshot below.
2. Set up a new service account
The Yugabyte Platform console requires a service account with the appropriate permissions to provision and manage compute instances. Go to IAM & admin > Service accounts and click Create Service Account. You can follow these instructions to create a service account.
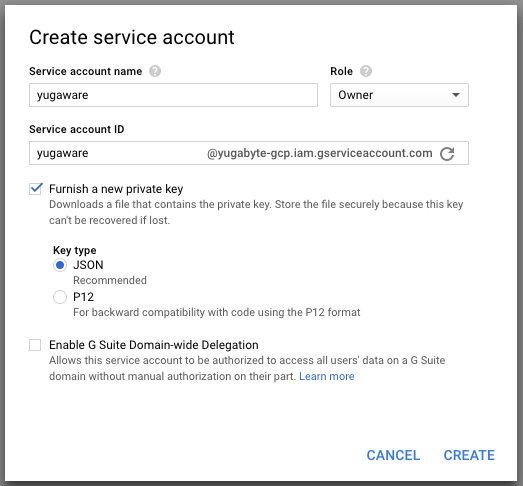
Fill the form with the following values:
- Service account name is
yugaware(you can customize the name, if needed). - Set the Project role to
Owner. - Check the box for Furnish a new private key, choose the
JSONoption.
Here is a screenshot with the above values in the form, click create once the values are filled in.
NOTE: Your web browser downloads the respective JSON format key. It is important to store it safely. This JSON key is needed to configure the Yugabyte Platform console.
3. Give permissions to the service account
- Find the email address associated with the service account by going to IAM & admin > Service accounts. Copy this value. The screen should look as shown below.

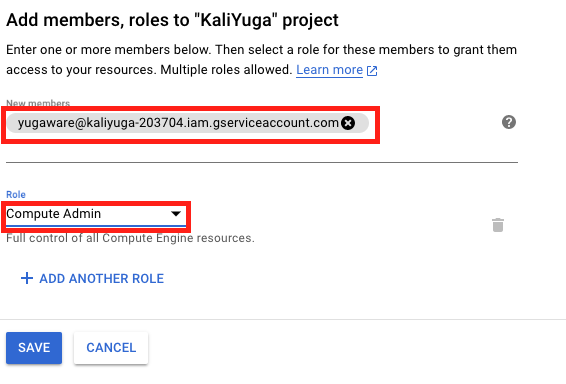
- Next, go to IAM & admin > IAM and click ADD. Add the compute admin role for this service account. A screenshot is shown below.
4. Creating a firewall rule
In order to access the Yugabyte Platform from outside the GCP environment, you would need to enable firewall rules. You will at minimum need to:
- Access the Yugabyte Platform instance over SSH (port
tcp:22) - Check, manage, and upgrade Yugabyte Platform (port
tcp:8800) - View the Yugabyte Platform console (port
tcp:80)
If you are using your own custom VPCs (self-managed configuration), the following additional TCP ports must be accessible: 7000, 7100, 9000, 9100, 11000, 12000, 9300, 9042, 5433, and 6379. For more information on ports used by YugabyteDB, refer to Default ports.
Create a firewall entry enabling these by going to VPC network > Firewall rules:
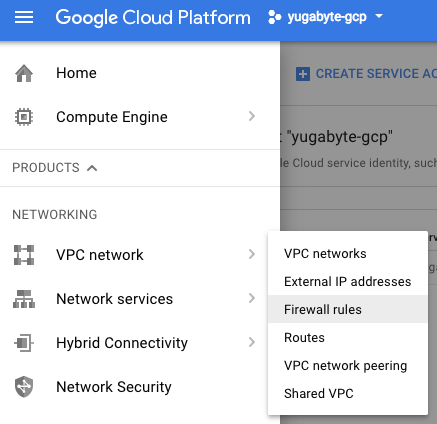
NOTE: If this is a new project, you might see a message saying Compute Engine is getting ready. If so, you would need to wait for a while. Once complete, you should see the default set of firewall rules for your default network, as shown below.

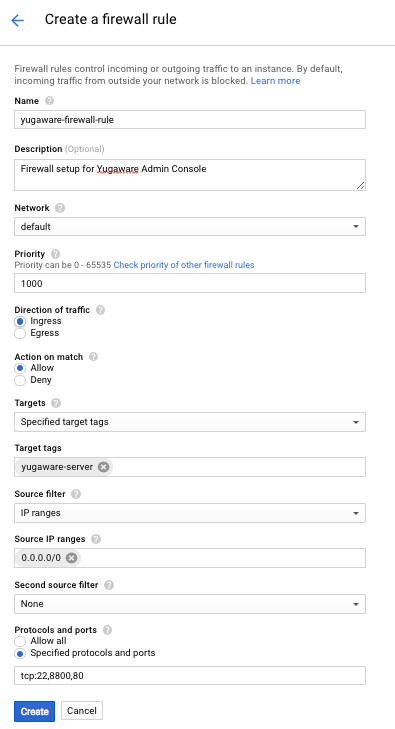
Click CREATE FIREWALL RULE and fill in the following.
- Enter
yugaware-firewall-ruleas the name (you can change the name if you want). - Add a description (for example,
Firewall setup for Yugabyte Platform console). - Add a tag
yugaware-serverto the Target tags field. This will be used later when creating instances. - Add the appropriate ip addresses to the Source IP ranges field. To allow access from any machine, add
0.0.0.0/0but note that this is not very secure. - Add the ports
tcp:22,8800,80to the Protocol and ports field. For a self-managed configuration, also add 7000, 7100, 9000, 9100, 11000, 12000, 9300, 9042, 5433, and 6379 to the tcp ports list.
You should see something like the screenshot below, click Create next.
5. Provision instance for Yugabyte Platform
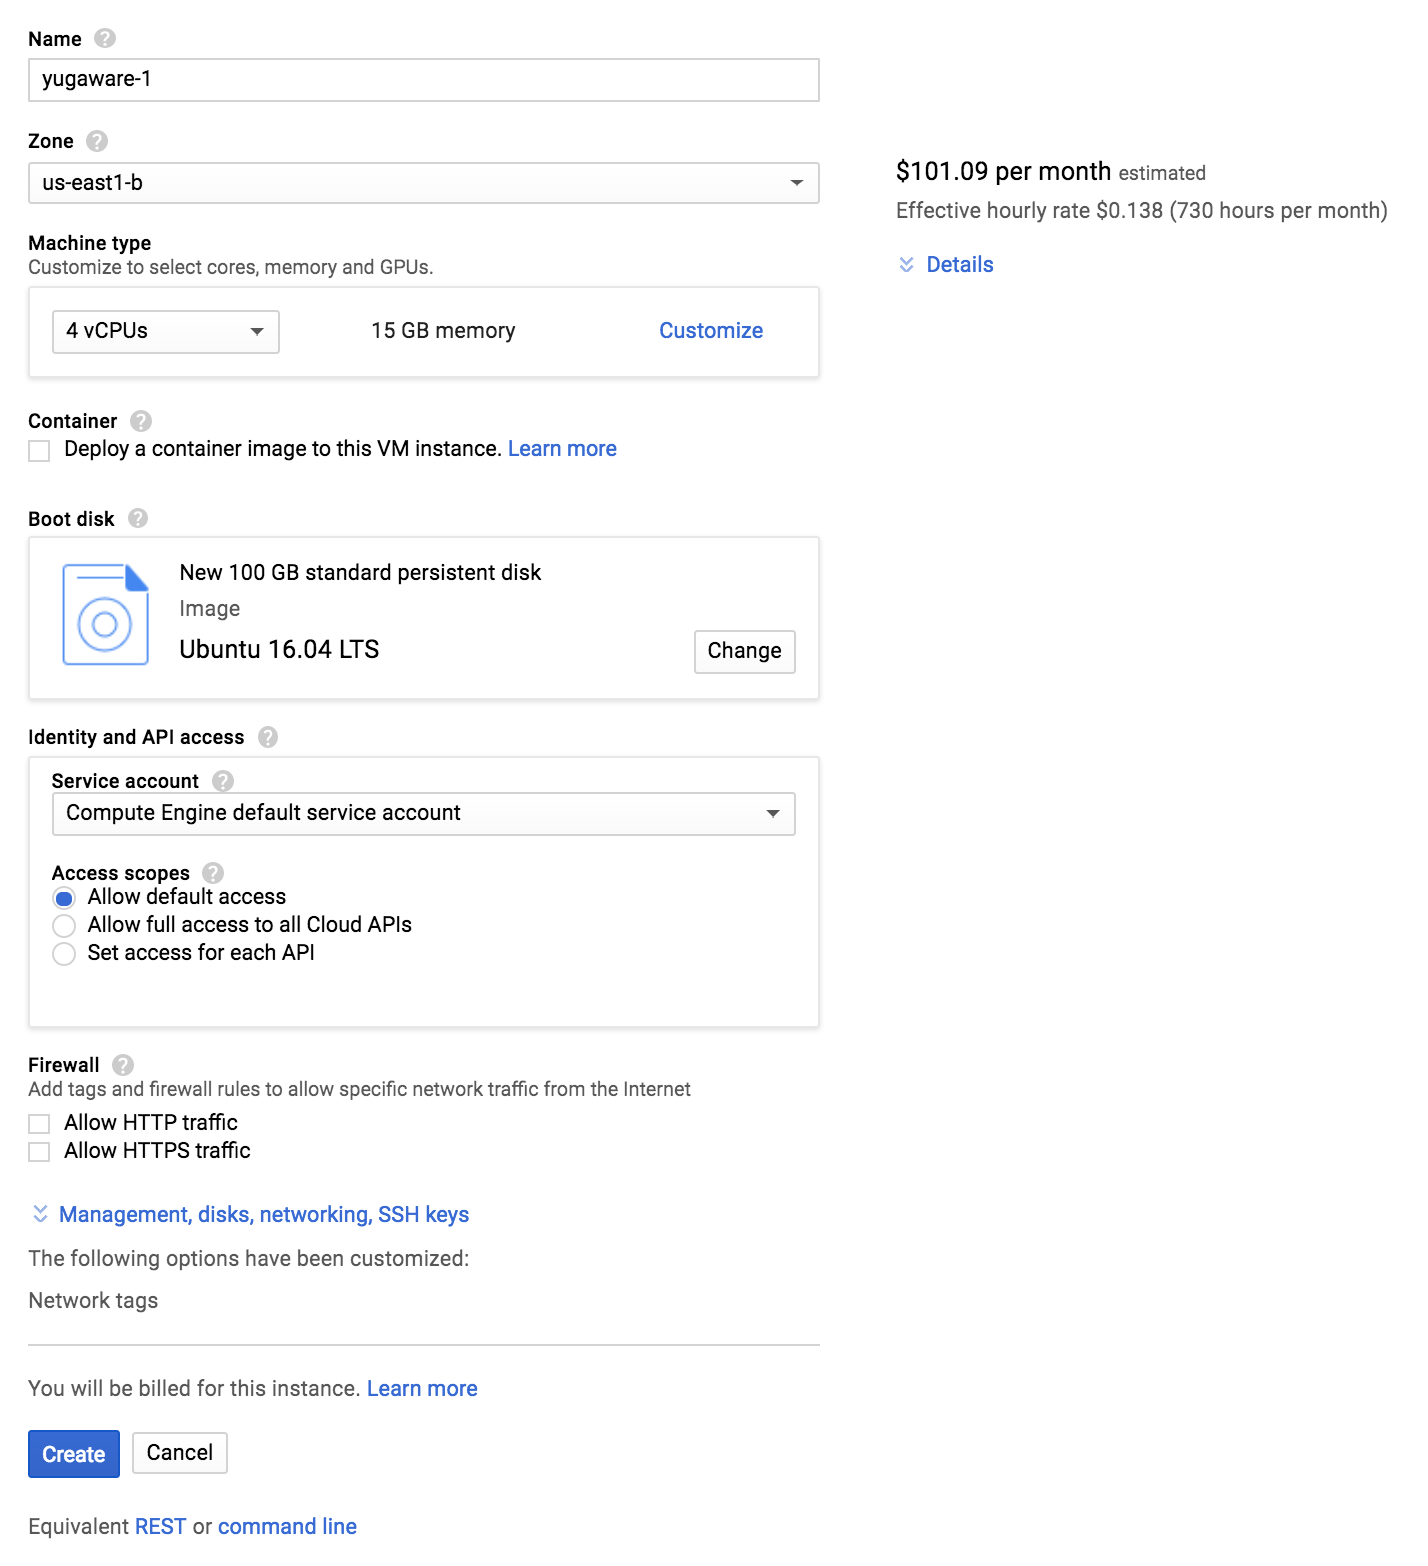
Create an instance to run Yugabyte Platform. In order to do so, go to Compute Engine > VM instances and click Create. Fill in the following values.
- Enter
yugaware-1as the name. - Pick a region/zone (eg:
us-west1-b). - Choose
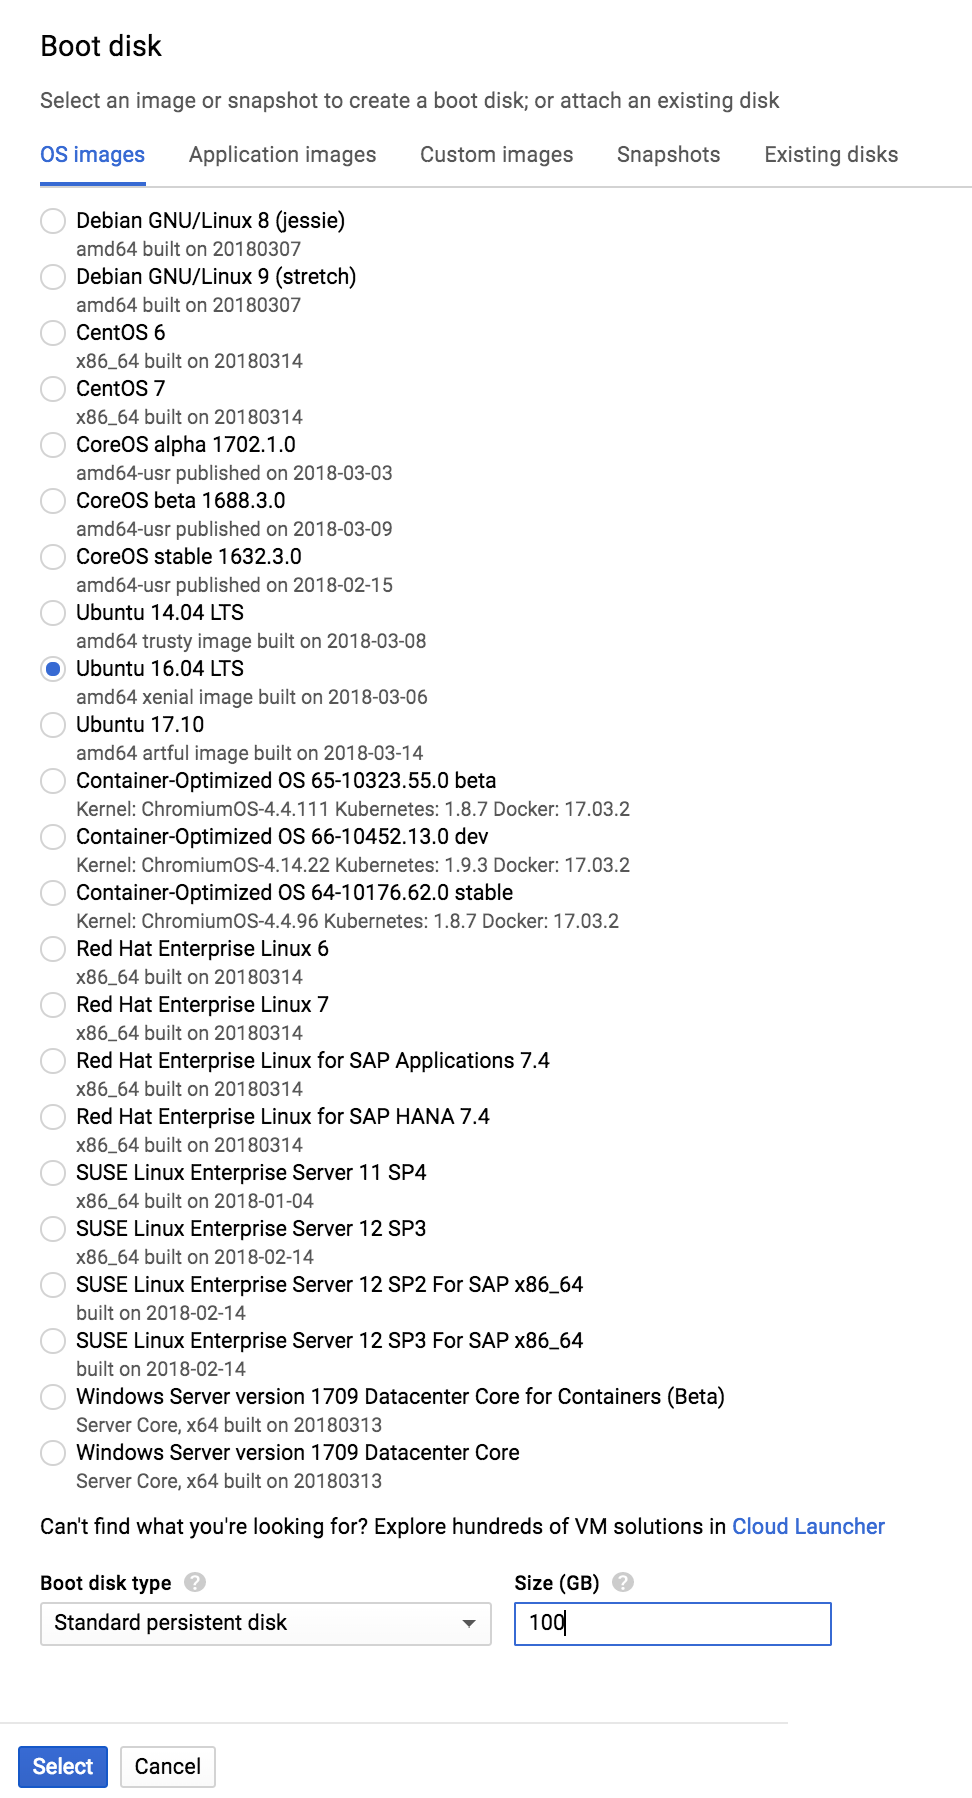
4 vCPUs(n1-standard-4) as the machine type. - Change the boot disk image to
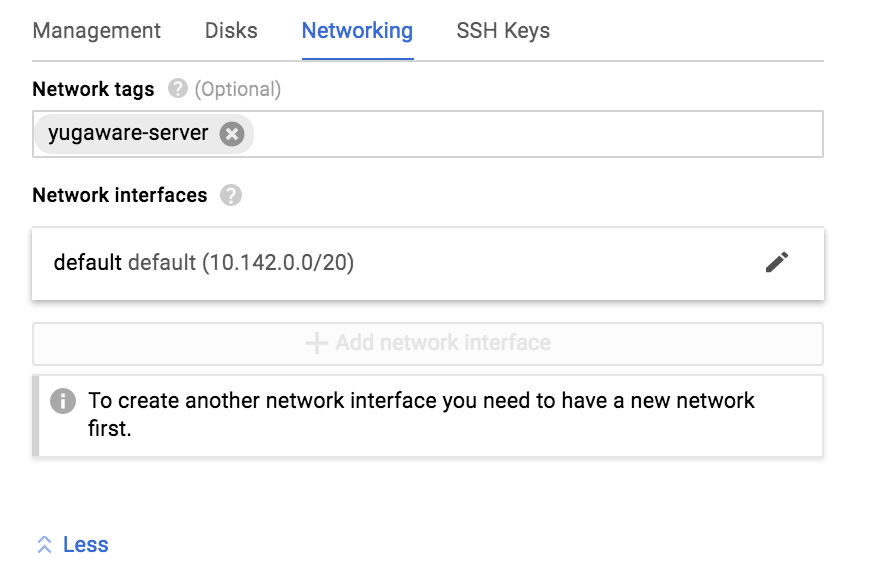
Ubuntu 16.04and increase the boot disk size to100GB. - Open Management, disks, networking, SSH keys -> Networking tab. Add
yugaware-serveras the network tag (or the custom name you chose when setting up the firewall rules). - Switch to the SSH Keys tab and add a custom public key and login user to this instance. First create a key-pair.
You can do this as shown below.
$ ssh-keygen -t rsa -f ~/.ssh/yugaware-1-gcp -C centos
Set the appropriate credentials for the SSH key.
$ chmod 400 ~/.ssh/yugaware-1-gcp
Now enter the contents of yugaware-1-gcp.pub as the value for this field.
Here are the detailed instructions to create a new SSH key pair, as well as the expected format for this field (eg: ssh-rsa [KEY_VALUE] [USERNAME]). This is important to enable SSH access to this machine.
Note on boot disk customization:
Note on networking customization:
Finally, click Create to launch the Yugabyte Platform server.
6. Connect to the Yugabyte Platform machine
From the GCP web management console, find the public IP address of the instance you just launched.
You can connect to this machine by running the following command (remember to replace XX.XX.XX.XX below with the IP address, and also to enter the appropriate SSH key instead of yugaware-1-gcp).
$ ssh -i ~/.ssh/yugaware-1-gcp centos@XX.XX.XX.XX