Create a multi-region universe
This section will describe how to create a universe spanning multiple geographic regions. In this example, we are first going to deploy a universe across Oregon (US-West), Northern Virginia (US-East) and Tokyo (Asia-Pacific). Once ready, we are going to connect to each node and perform the following:
- Run the CassandraKeyValue workload
- Write data with global consistency (higher latencies because we chose nodes in far away regions)
- Read data from the local data center (low latency timeline consistent reads)
- Verify the latencies of the overall app
1. Create the universe
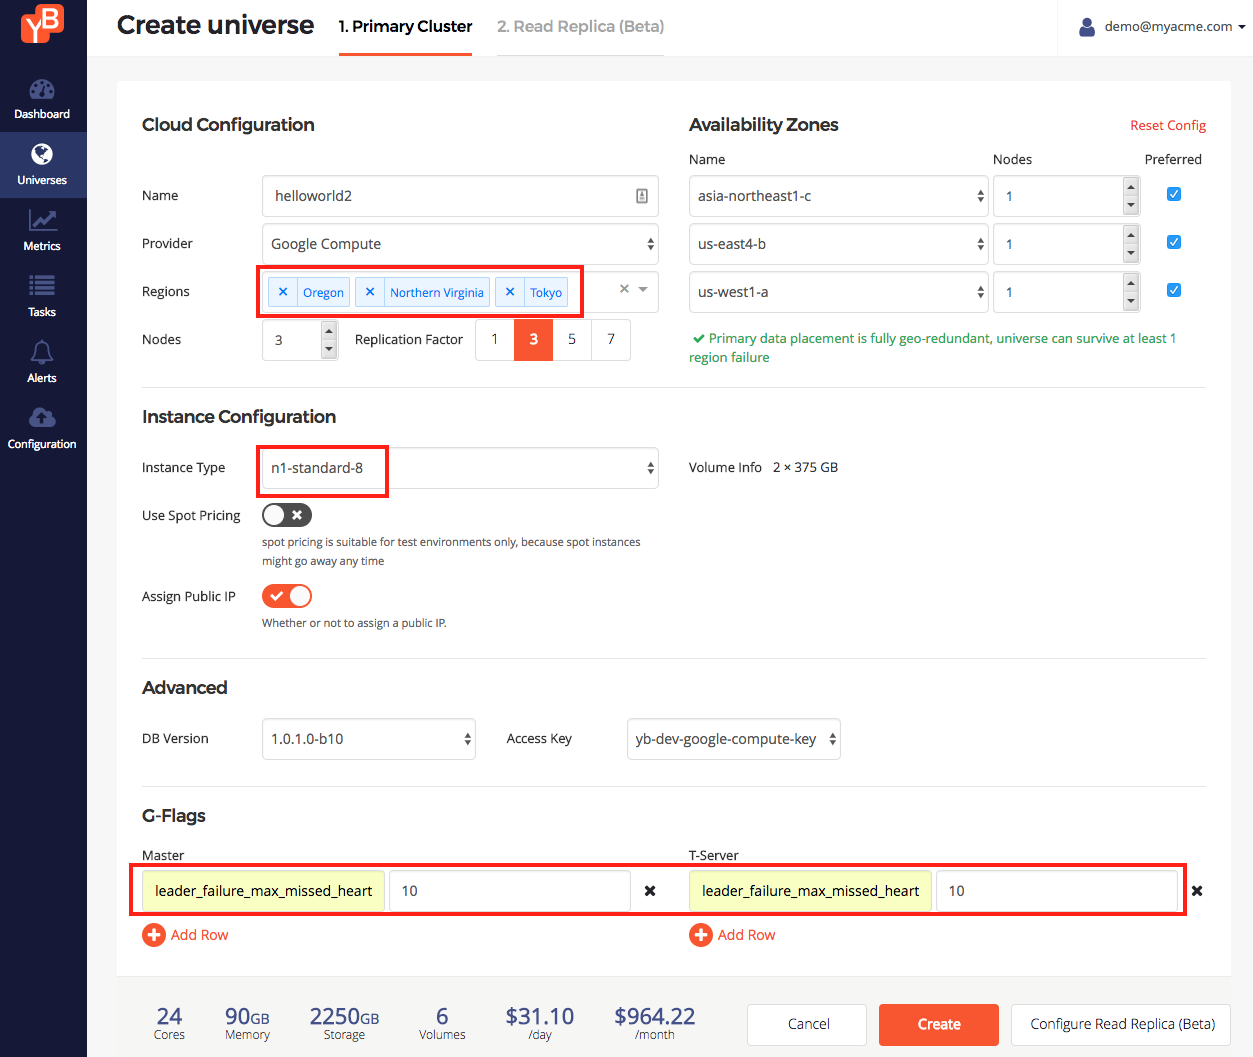
We are going to enter the following values to create a multi-region universe on GCP provider. Click Create Universe and enter the following intent.
- Enter a universe name: helloworld2
- Enter the set of regions: Oregon, Northern Virginia, Tokyo
- Change instance type: n1-standard-8
- Add the following flag for Master and T-Server:
leader_failure_max_missed_heartbeat_periods = 10. Because the data is globally replicated, RPC latencies are higher. We use this flag to increase the failure detection interval in such a higher RPC latency deployment. See the screenshot below.
Click Create.
2. Examine the universe
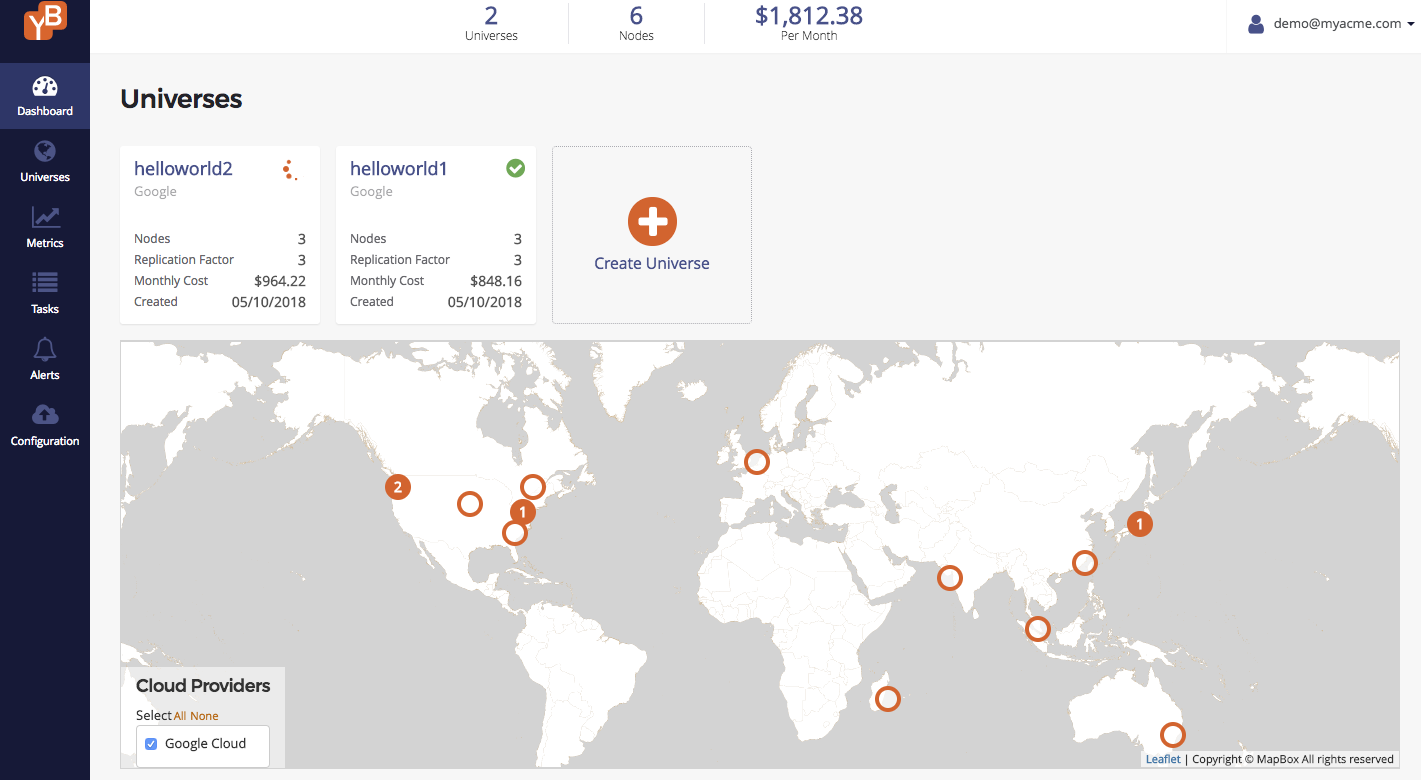
Wait for the universe to get created. Note that Yugabyte Platform can manage multiple universes as shown below.
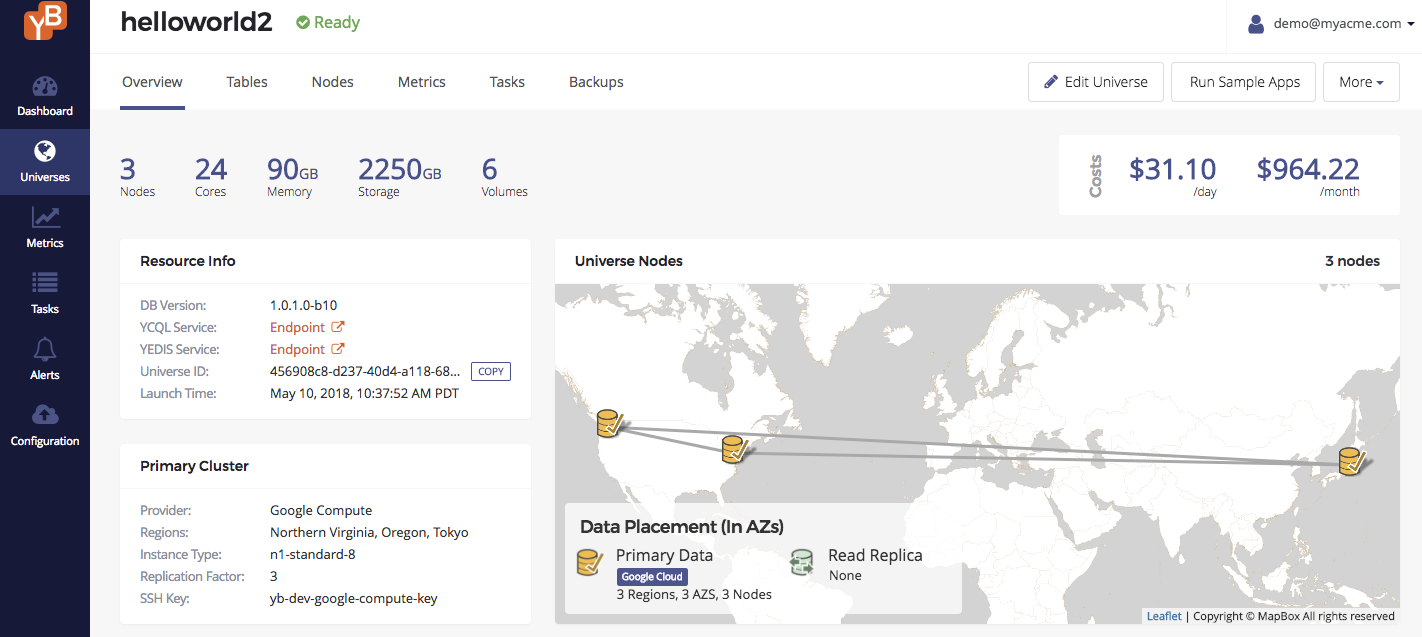
Once the universe is created, you should see something like the screenshot below in the universe overview.
Universe nodes
You can browse to the Nodes tab of the universe to see a list of nodes. Note that the nodes are across the different geographic regions.

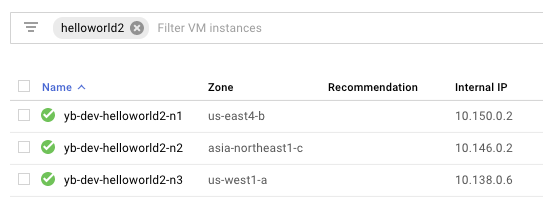
Browse to the cloud provider's instances page. In this example, since we are using Google Cloud Platform as the cloud provider, browse to Compute Engine -> VM Instances and search for instances that have helloworld2 in their name. You should see something as follows. It is easy to verify that the instances were created in the appropriate regions.
3. Run a global application
In this section, we are going to connect to each node and perform the following:
- Run the
CassandraKeyValueworkload - Write data with global consistency (higher latencies because we chose nodes in far away regions)
- Read data from the local data center (low latency, timeline-consistent reads)
Browse to the Nodes tab to find the nodes and click Connect. This should bring up a dialog showing how to connect to the nodes.
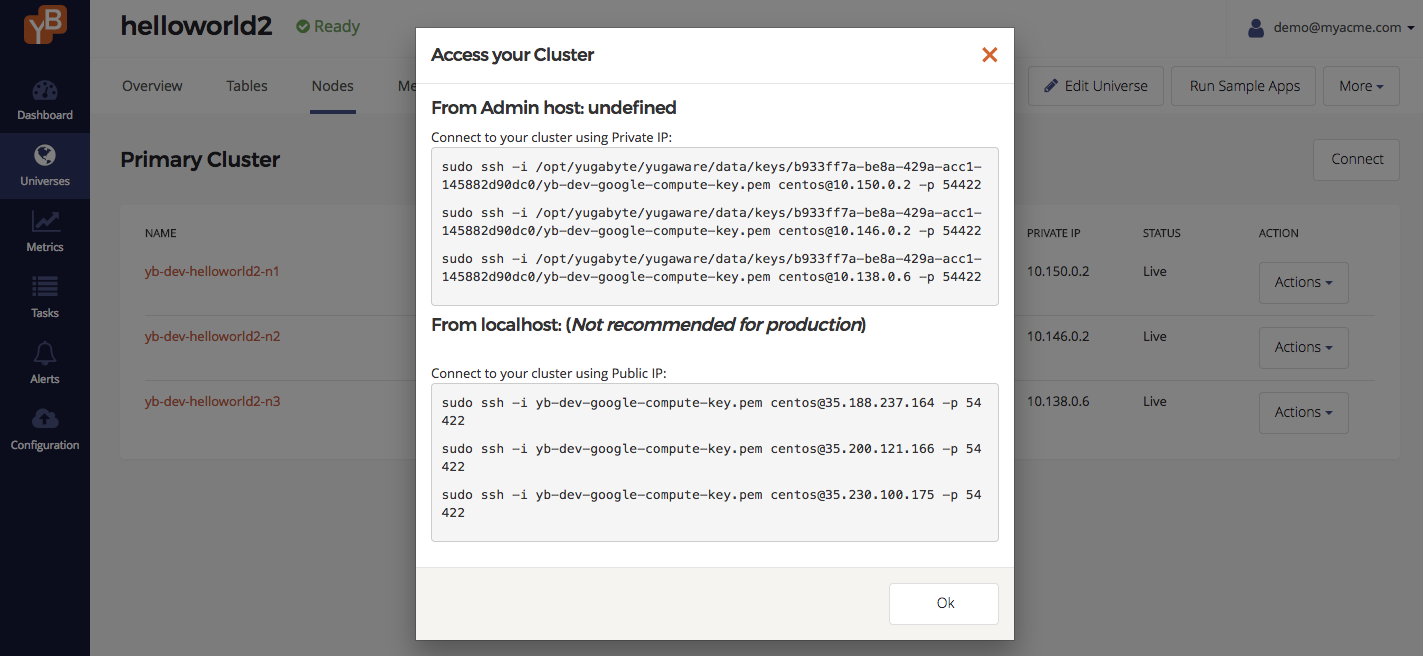
Connect to the nodes
Create three Bash terminals and connect to each of the nodes by running the commands shown in the popup above. We are going to start a workload from each of the nodes. Below is a screenshot of the terminals.
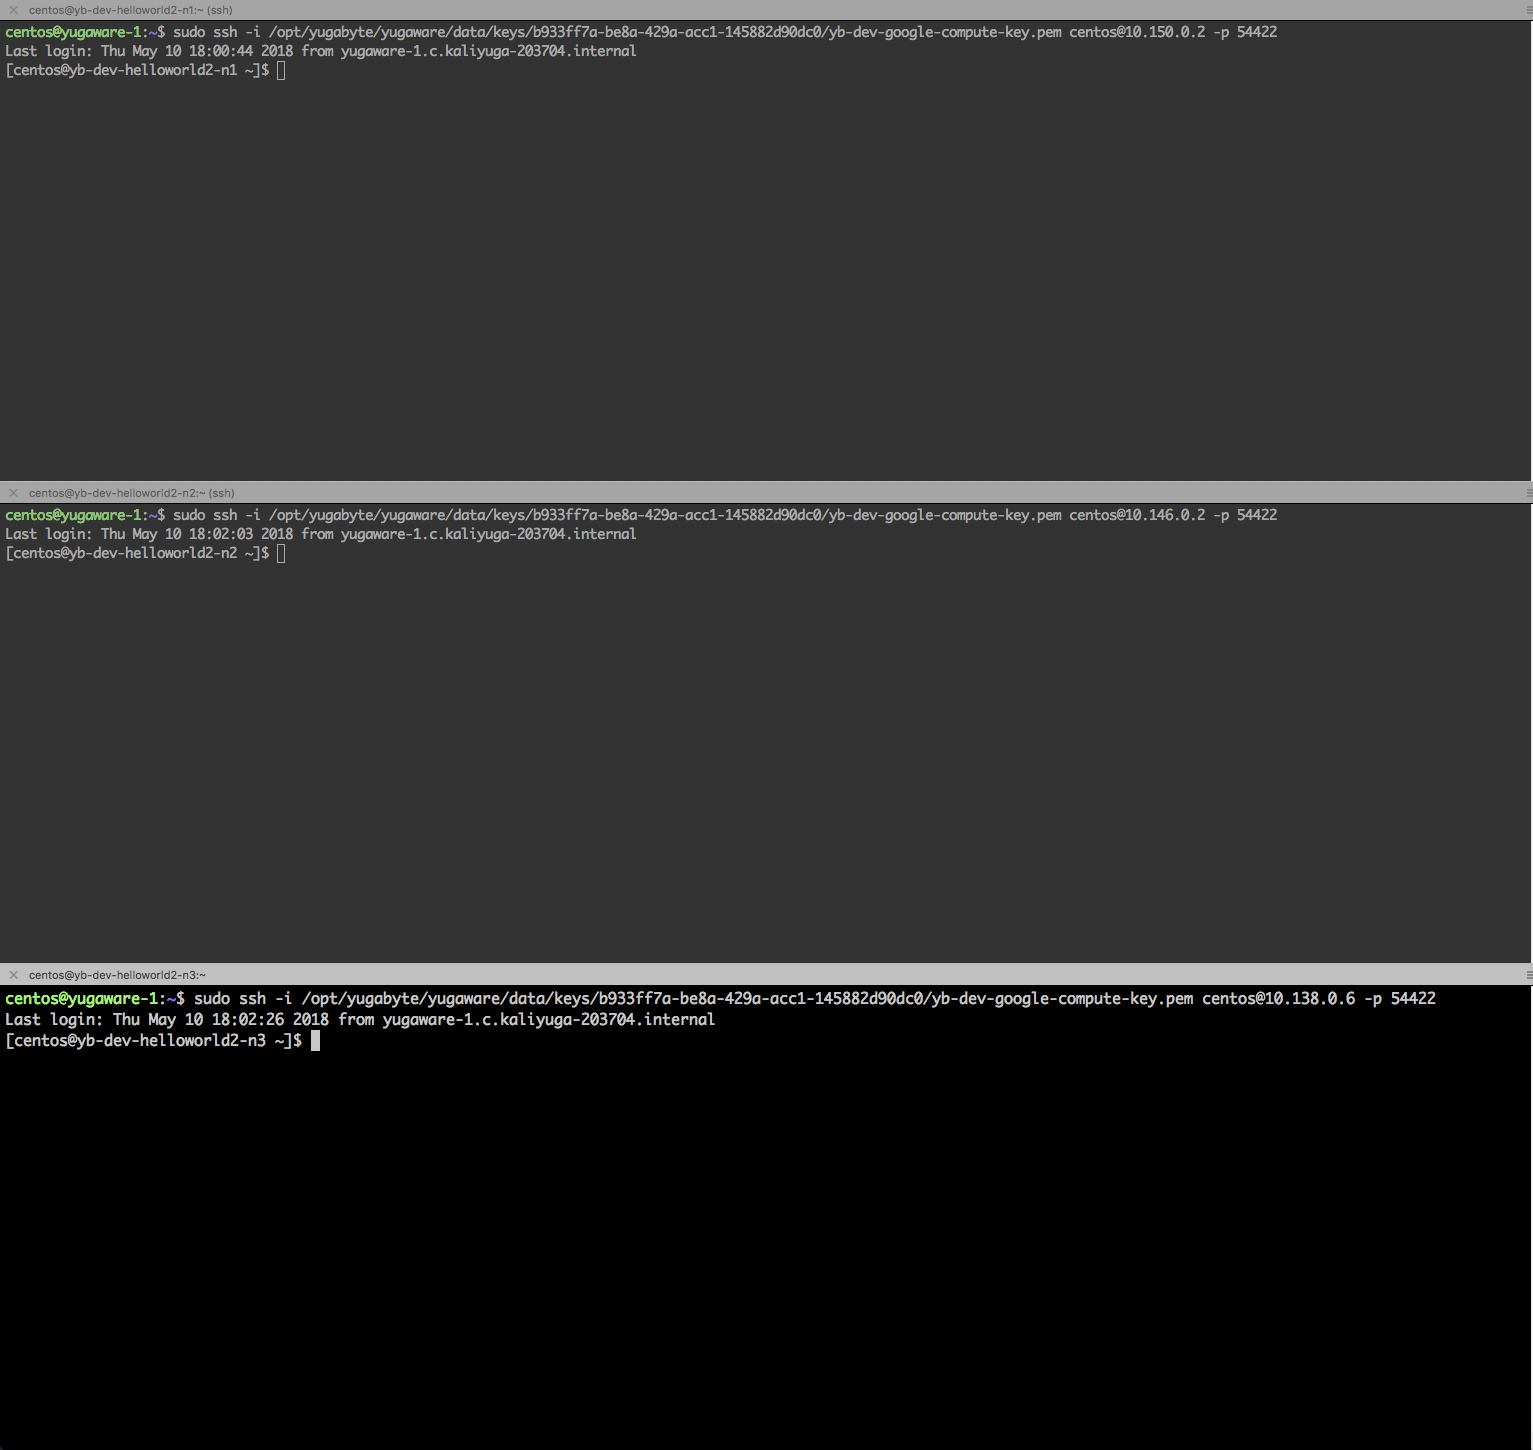
On each of the terminals, do the following.
-
Install Java.
$ sudo yum install java-1.8.0-openjdk.x86_64 -y -
Switch to the
yugabyteuser.$ sudo su - yugabyte -
Export the
YCQL_ENDPOINTSenvironment variable.
Export an environment variable telling us the IP addresses for nodes in the cluster. Browse to the Universe Overview tab in Yugabyte Platform console and click YCQL Endpoints. A new tab opens displaying a list of IP addresses.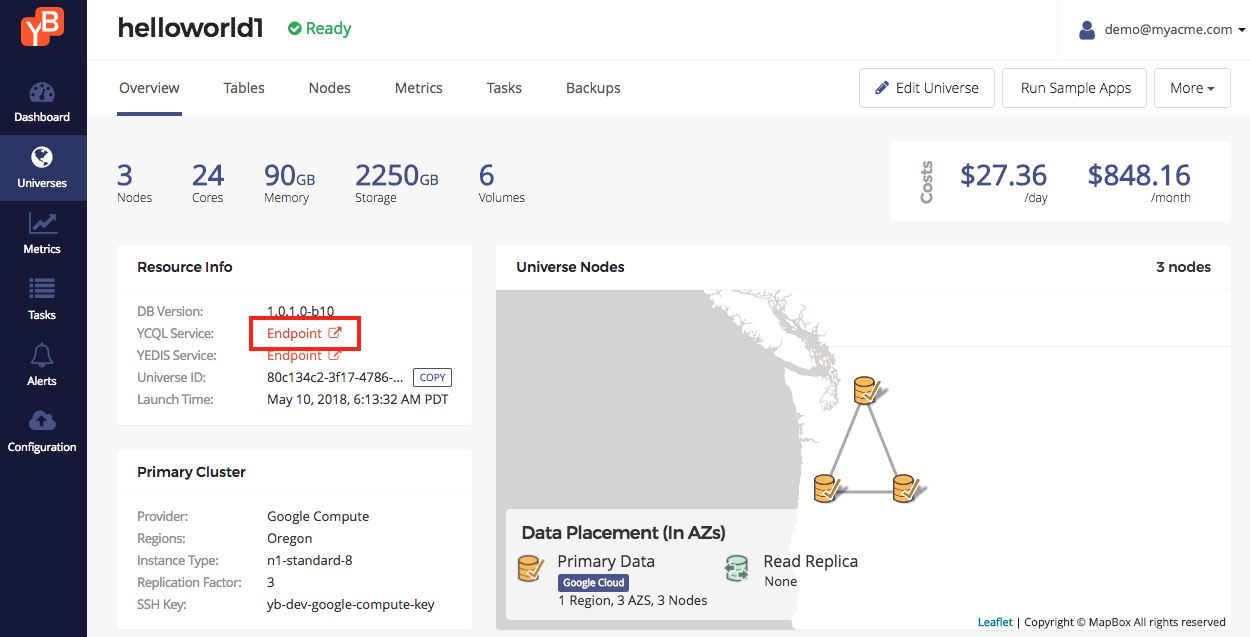
Export this into a shell variable on the database nodeyb-dev-helloworld1-n1you connected to. Remember to replace the IP addresses below with those shown in the Yugabyte Platform console.$ export YCQL_ENDPOINTS="10.138.0.3:9042,10.138.0.4:9042,10.138.0.5:9042"
Run the workload
Run the following command on each of the nodes. Remember to substitute <REGION> with the region code for each node.
$ java -jar /home/yugabyte/tserver/java/yb-sample-apps.jar \
            --workload CassandraKeyValue \
            --nodes $YCQL_ENDPOINTS \
            --num_threads_write 1 \
            --num_threads_read 32 \
            --num_unique_keys 10000000 \
            --local_reads \
            --with_local_dc <REGION>
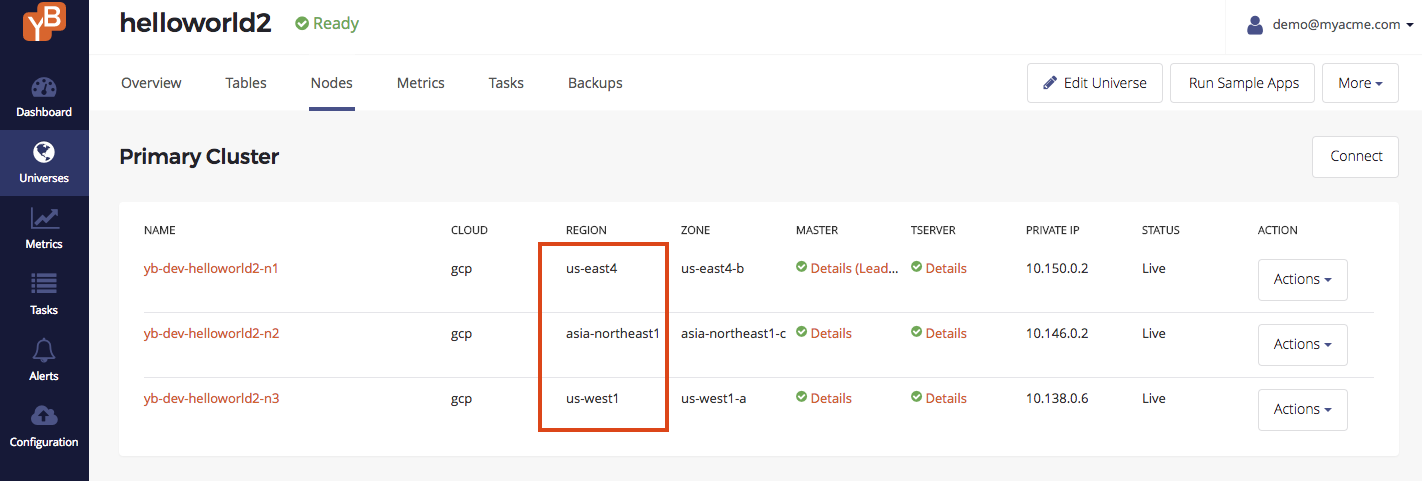
You can find the region codes for each of the nodes by browsing to the Nodes tab for this universe in the Yugabyte Platform console. A screenshot is shown below. In this example, the value for <REGION> is:
us-east4for nodeyb-dev-helloworld2-n1asia-northeast1for nodeyb-dev-helloworld2-n2us-west1for nodeyb-dev-helloworld2-n3
4. Check the performance characteristics of the app
Recall that we expect the app to have the following characteristics based on its deployment configuration:
- Global consistency on writes, which would cause higher latencies in order to replicate data across multiple geographic regions.
- Low latency reads from the nearest data center, which offers timeline consistency (similar to asynchronous replication).
Let us verify this by browse to the Metrics tab of the universe in the Yugabyte Platform console to see the overall performance of the app. It should look similar to the screenshot below.
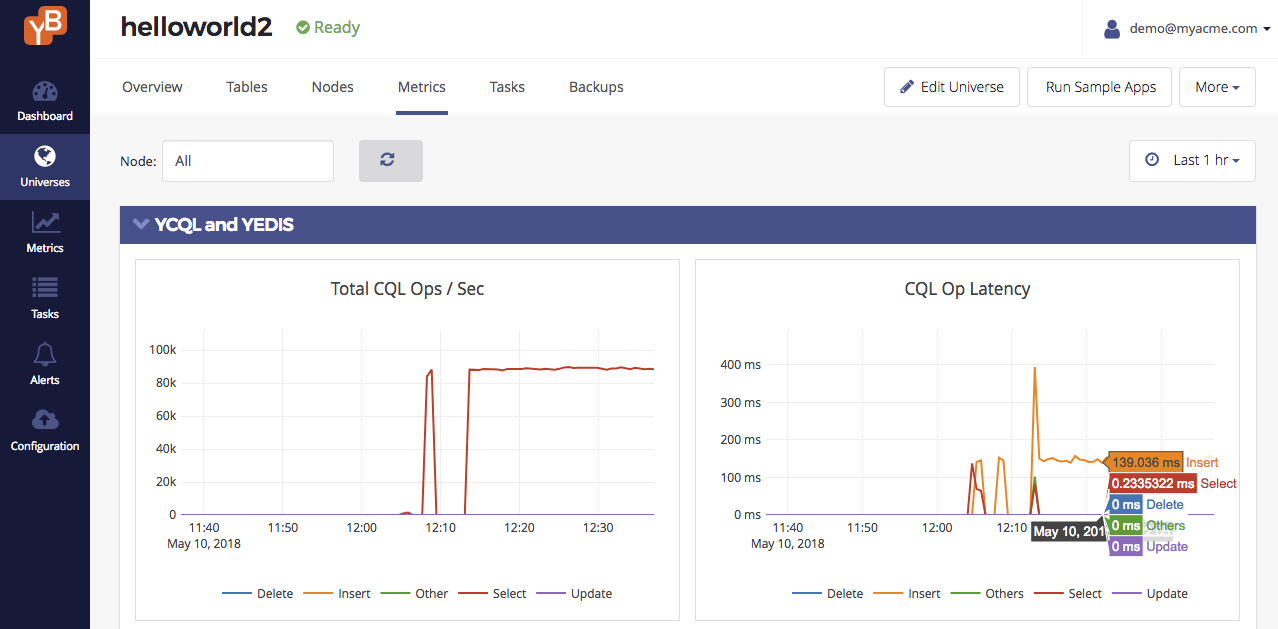
Note the following:
- Write latency is 139ms because it has to replicate data to a quorum of nodes across multiple geographic regions.
- Read latency is 0.23 ms across all regions. Note that the app is performing 100K reads/sec across the regions (about 33K reads/sec in each region).
It is possible to repeat the same experiment with the RedisKeyValue app and get similar results.